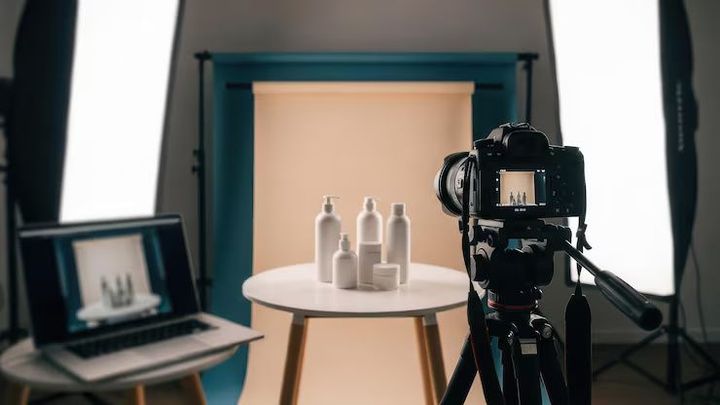
Product Photography Guide: Tips for Clear and Professional Images
Product photography is the practice of capturing photographs that show an item clearly and accurately. These images appear in online catalogs, social media posts, printed materials, and digital presentations. A well-planned photograph helps people understand what an item looks like, how it is used, and what details make it unique. You do not need a professional studio to begin learning product photography.
Many impressive images are created with simple equipment, thoughtful lighting, and careful composition. The goal is not to create dramatic effects but to present the subject in a way that feels natural, detailed, and easy to understand.
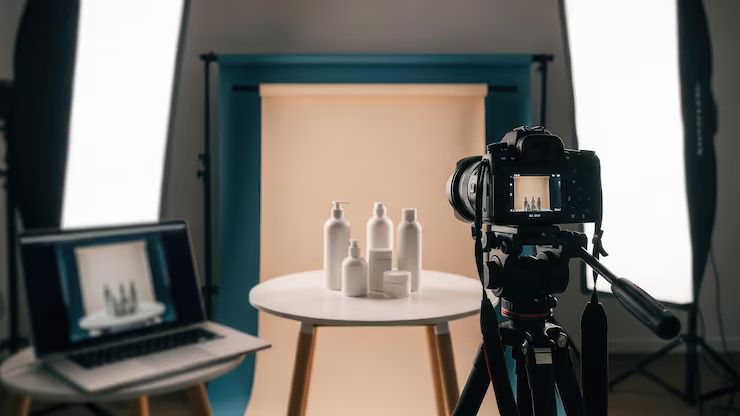
Whether you are photographing handmade crafts, clothing, electronics, food, or household items, learning the basics can improve the overall quality of your images.
Why Product Photography Matters
People often rely on photographs before reading descriptions. A clear image creates a strong first impression and answers many visual questions immediately. Sharp, well-lit photos help viewers examine colors, textures, shapes, and important details.
Good product photography also supports consistency. When every image follows a similar style, a collection of products appears organized and professional. This consistency makes it easier for viewers to compare different items.
Essential Equipment
You can begin with simple tools and gradually expand your setup as your skills improve.
Camera
Many modern smartphones capture excellent photographs. Dedicated cameras provide additional manual controls, but they are not required for learning the fundamentals.
Tripod
A tripod keeps the camera steady and helps avoid blurry images. It also allows every photograph to be taken from the same angle, creating a consistent appearance.
Lighting
Light is one of the most important parts of photography. Natural light from a large window often creates soft and balanced images. Artificial lights with diffusers can also provide reliable results, especially when working indoors.
Background
A clean, uncluttered background keeps attention on the subject. White, gray, or light-colored backdrops are common because they reduce distractions and create a neat presentation.
Understanding Lighting
Lighting shapes the appearance of every photograph. Even an expensive camera cannot compensate for poor lighting.
Natural Light
Soft daylight works well for many products. Position the item near a window and avoid direct sunlight, which can create harsh shadows and bright highlights.
Cloudy days often produce even lighting because the clouds naturally diffuse sunlight.
Artificial Light
LED panels or continuous lights provide consistent illumination throughout the photography session. Diffusers soften the light, reducing strong shadows and creating a more balanced look.
Using two light sources from different directions can help reveal details without making the image appear flat.
Choosing the Right Background
The background should support the product rather than compete with it.
Simple backgrounds help viewers focus on the subject. White backgrounds remain popular because they create a clean appearance, while textured surfaces such as wood or fabric may add warmth when they fit the overall style.
Avoid backgrounds with busy patterns, bright colors, or unnecessary objects that distract from the main subject.
Composition Basics
Composition refers to how the subject is arranged within the frame.
Place the product so it appears balanced and comfortable to view. Leave enough space around the edges while ensuring the item remains the main point of attention.
Experiment with different angles. A front view, side view, overhead perspective, or close-up may reveal different features. Multiple angles provide a more complete understanding of the product.
Camera Settings
Learning a few basic camera settings can noticeably improve image quality.
Focus
Ensure the main subject is sharp. Most cameras and smartphones allow you to tap or select the area where you want the focus to appear.
Aperture
A wider aperture creates a blurred background, while a narrower aperture keeps more of the product in focus. Small products often benefit from greater overall sharpness.
ISO
Keep the ISO as low as possible to reduce image noise. Increasing available light usually produces cleaner photographs than raising the ISO setting.
Shutter Speed
When using a tripod, slower shutter speeds can be used safely because the camera remains stable.
Styling the Product
Preparation is just as important as photography.
Before taking pictures, clean the product carefully. Dust, fingerprints, and small marks become much more visible in close-up images.
Arrange the item neatly and check that labels, edges, and important features are clearly visible.
Some photographs include simple props that help explain size or everyday use. Keep these additions minimal so they support rather than distract from the main subject.
Photographing Different Types of Products
Different categories require slightly different approaches.
Clothing
Display clothing on a mannequin, hanger, or flat surface. Smooth wrinkles before photographing and capture both full views and close-up details of fabrics and stitching.
Jewelry
Jewelry reflects light easily, making lighting especially important. Soft, diffused lighting reduces unwanted reflections while highlighting texture and sparkle.
Food
Fresh ingredients and natural colors help food appear appealing. Work efficiently because food changes appearance over time.
Electronics
Photograph electronics from several angles and include close-ups of buttons, ports, screens, and other important features.
Editing Your Images
Editing is the final step before sharing photographs.
Simple adjustments often make a noticeable difference without changing the product's appearance.
Useful edits include:
- Adjusting brightness
- Correcting contrast
- Improving white balance
- Straightening the image
- Cropping unnecessary space
- Removing small dust spots
The goal is to present the product accurately rather than dramatically changing its appearance.
Common Mistakes to Avoid
Many beginners encounter similar challenges, but they become easier to recognize with practice.
Common mistakes include:
- Poor lighting that hides important details
- Blurry photographs caused by camera movement
- Busy backgrounds that distract attention
- Incorrect color balance
- Cropping important parts of the product
- Inconsistent image sizes and angles
- Visible dust or fingerprints
Taking a few extra moments to inspect each image can prevent many of these issues.
Creating a Consistent Style
Consistency helps a collection of photographs appear organized and easy to browse.
Try to use the same lighting, background, camera height, and editing style across multiple images. Similar framing and spacing create a clean visual presentation and make comparisons easier.
Keeping a simple checklist before each photography session can help maintain this consistency.
Practicing Your Skills
Photography improves through regular practice. Experiment with different lighting conditions, camera angles, and backgrounds to discover what works well for different products.
Review your images carefully after each session. Notice what looks natural and what could be improved. Small adjustments often produce significant improvements over time.
Learning from each session builds confidence and develops a stronger understanding of composition, lighting, and visual storytelling.
Conclusion
Product photography combines observation, preparation, lighting, and thoughtful composition. While advanced equipment can provide additional flexibility, clear and engaging photographs are possible with simple tools and careful planning.
By focusing on clean backgrounds, balanced lighting, accurate colors, and consistent presentation, anyone can create photographs that communicate information clearly. As your experience grows, each photography session becomes an opportunity to refine your technique and develop a personal visual style that remains informative, natural, and easy to understand.